Obtaining the Rootstock
The rootstock is the lower portion of the tree where you will graft (permanently attach) a cutting (scion) from a mature, fruit-producing tree. The scion develops into the upper canopy portion of the tree where the mango fruits develop, and the rootstock forms the lower portion of the trunk and root system.

You can easily grow your own rootstock seedling by planting a polyembryonic seed obtained from an Indochinese mango. You can identify these type of mangoes by their green and yellow colors, and elongated shape. They lack the colorful hues, and roundish shape of Indian mangoes.
The seedlings produced from polyembryonic seeds are more uniform, which leads to a stronger base, compared to seedlings produced from Indian varieties.
Tips for planting the seed include:
- Remove the leathery husk surrounding the kidney-shaped seed.
- Fill a 1-gallon (3.8 L) container with a well-drained potting mix, being sure the container has bottom drainage.
- Plant the seed about 1/2 inch (12.5 mm) deep and water well. When the top inch of soil feels dry, water the container.
- Place the container in a warm, sunny location and germination should occur in several weeks.
- Once the rootstock seedling grows as large as the diameter of a pencil, it’s ready for the scion to be attached.
Expert Tip: When deciding when to plant your seed, consider that it might take a few months for your seed to germinate and grow to a suitable size. In addition, it’s best to graft the scion to the rootstock during the warmest months of the year.
Preparing the Scion
Although you can graft a mango scion through various grafting techniques including, chip budding, whip and cleft grafting, the most reliable technique is through veneer grafting.
- For the best success, gather your scion while the mango tree is in active growth.
- Using sanitized pruning snips, remove a tender terminal shoot where the bud is just beginning to enlarge.
- Remove about a 3-inch section (7.6 cm) and snip off all the leaves.
Expert Tip: If you are unable to graft the scion to the rootstock seedling immediately after taking it, you can store it inside a plastic bag and place in the refrigerator. You can safely keep it there for up to two weeks before you need to use it.
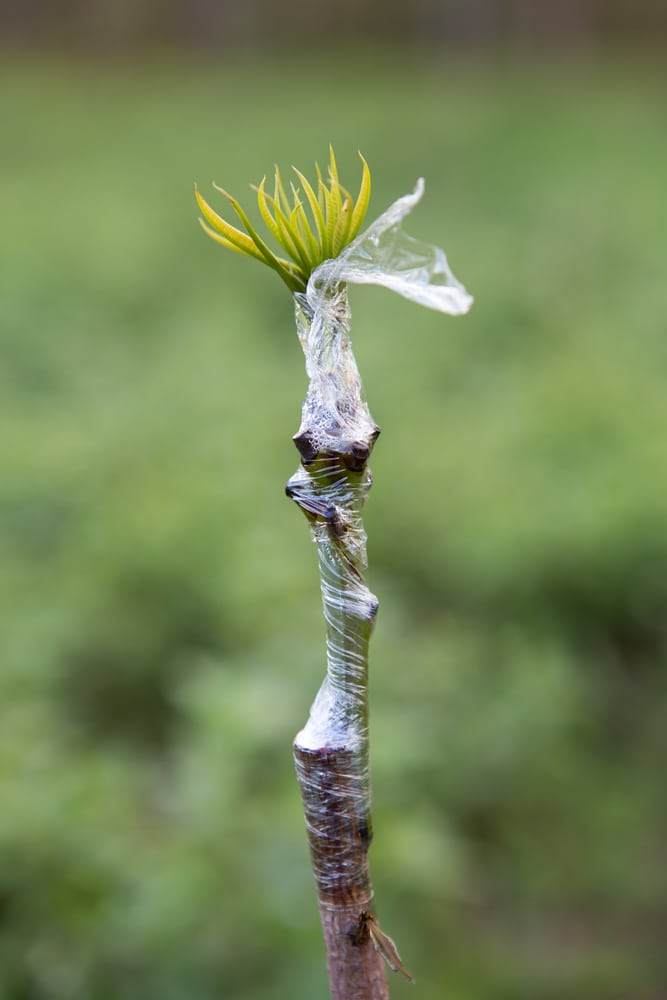
Preparing the Graft
Once your mango seedling rootstock has achieved a suitable size and your scion is ready, you can now accomplish the graft. It’s best to select a scion that is approximately the same diameter as the rootstock.

- About 2 to 3 inches up from the soil line, make a shallow veneer cut into the rootstock, allowing the flap to remain, which is where the scion is attached and holds it in place. A veneer cut exposes the cambium region on both the scion and the rootstock and this is where the active growth takes place.
- Make a veneer cut on the bottom of the scion.
- Place the cut section of the scion into the cut of the rootstock, placing it inside the flap and bringing the two sections together.
- Using grafting tape, wrap the two sections together, being sure to leave the tip of scion’s terminal bud exposed and unwrapped. You have now completed the graft.
Once you’ve connected the two sections together, place the grafted mango seedling into a shady location out of direct sunlight and care for as usual. The graft should begin connecting in about three weeks.
After the scion develops a flush of leaves, cut the rootstock off just about the graft and remove any suckers that might arise from it.