How do I get started?
Select a type of grape to grow. There is a lot of variety for you to choose from and some grapes do better in certain USDA hardiness zones than others. Since grapes of different types can be grown in zones two through ten, it’s worth a little research to select the best plant for your area.
Once you’ve decided on table grapes, wine grapes, seedless grapes, or whatever you like, there is some garden preparation work to be done.
You’ll need a place to plant your vines where the soil is deep, loose, and well-drained and gets full to nearly full sun. Grape vines like warm soil, so more sun is better. Soil should be slightly acidic or neutral.
In addition to a great location, your grape vines will require some sort of support structure, so be sure your trellis, arbor, fence, or other support is in place before you plant.
How do I grow grapes from seed?
Grape seeds must experience several months of exposure to cold temperatures in order to germinate properly once they are planted. This process, called stratification, readies the seed for planting.
To get your seeds ready for the ground in spring, start stratifying them in December:
- Using a zipper bag or other airtight container is necessary. Add a soft seed-bed material such as peat, sand, vermiculite, or even wet paper towels. Peat moss is the ideal choice here, because it has antifungal properties to protect against mold in your seeds.
- Insert your seeds into your chosen filler, about one-half inch down, and cover them with half an inch of soil or other growing medium. Close the container securely.
- Find a place with a consistent temperature of about 35F-40F (1C to 4C) to keep your seeds in for the next few months. An easy and convenient place for this process is your refrigerator, but you can use your garage or shed if it stays cold enough over the winter. Be careful not to let your seeds freeze.
- Note a date on your calendar at least three months in the future, sometime in the early spring, to remove your seeds from their winter home and get them into starter pots.
Once your seeds have been stratified, they’re ready to be germinated. To do this:
- Plant your seeds in pots filled with good soil. For pots, you may choose to do several small containers or a larger one that will allow you to plant several seeds at least one and a half inches apart.
- Moisten the soil in the pot. Germinating seeds don’t need to be extremely wet.
- Keep your seeds warm. To germinate, grape seeds require a daytime temperature of at least 70F (20C) and night time temps of about 60F (15C). You can maintain sufficient heat for your seeds with a heating pad, warming mat, or even a greenhouse, if you need.
- When the soil in your pots appears to be getting dry, sprinkle lightly with water, or use a mister to dampen the growing medium.
- Be patient. Grape seeds can take as few as two weeks, or as many as eight, to sprout.
Once your seeds have germinated and are growing, wait for them to reach about three inches tall (8cm) and then move to larger pots. Let the new plants grow until they are about a foot tall (30cm) and have several leaves; at this point it’s early in the spring and you can transplant your new vines into the ground.
How do I plant grape vine starts?
The process for planting your vines is the same whether you’ve started your plants from seed or purchased bare root starts. The main thing to remember here is to plant early in the spring, and to prepare your soil before planting.
Various grapes do better with slightly different pH levels, ranging from 5.5 to 7, so it is worthwhile to pH test your soil and adjust it to suit the particular type of grape you’re growing. (This information can be found on seed or start packaging, in an almanac,or from a nursery or university extension office.)
It’s never a bad idea to add compost to the soil you’ll be planting in and if the dirt is thick or heavy the compost will help it drain better. You can also use sand or different soils to make your planting area more friendly to your grape vines.
Before planting, soak the roots of your plants in water for two or three hours prior to planting. And be sure you’ve got some sort of trellis in place, with both vertical and horizontal supports for your growing plants. Grapes do best with physical support for vines that will eventually become heavy with fruit.
To start planting, dig one hole per vine, a foot deep (30cm), a foot wide, and six to ten feet (183 to 305cm) apart. place about four inches (10cm) of topsoil in it. Trim off any broken or damaged roots from the plant, and place it in the hole, a bit deeper than it was originally planted. Place six inches (15cm) of soil in the hole and around the root; tamp it down.
At this point, you can add the rest of the dirt to fill in the hole, but don’t press it down. Once the plant is in the ground, prune it back to just two or three vine bud, and then water well.
How do I care for my grape vines?
In the first couple of years, your grape vines will not bear grapes and to ensure fruit in the third year, you’ll need to prune each year so that the plant will be healthy and ready to produce. This is probably the most important aspect of grape vine care.
Fertilizing is not necessary in your plant’s first year. In the second year, a light application of an organic fertilizer is good. Mulch may be used to retain moisture, but if the climate where you live is cool, remember that mulch can reduce the temperature of your soil, which is not good for your vines.
Your vines will produce fruit buds that birds enjoy eating. Bird netting or mesh will protect your plants from avian diners, thus allowing your fruit to mature.
When can I harvest my grapes?
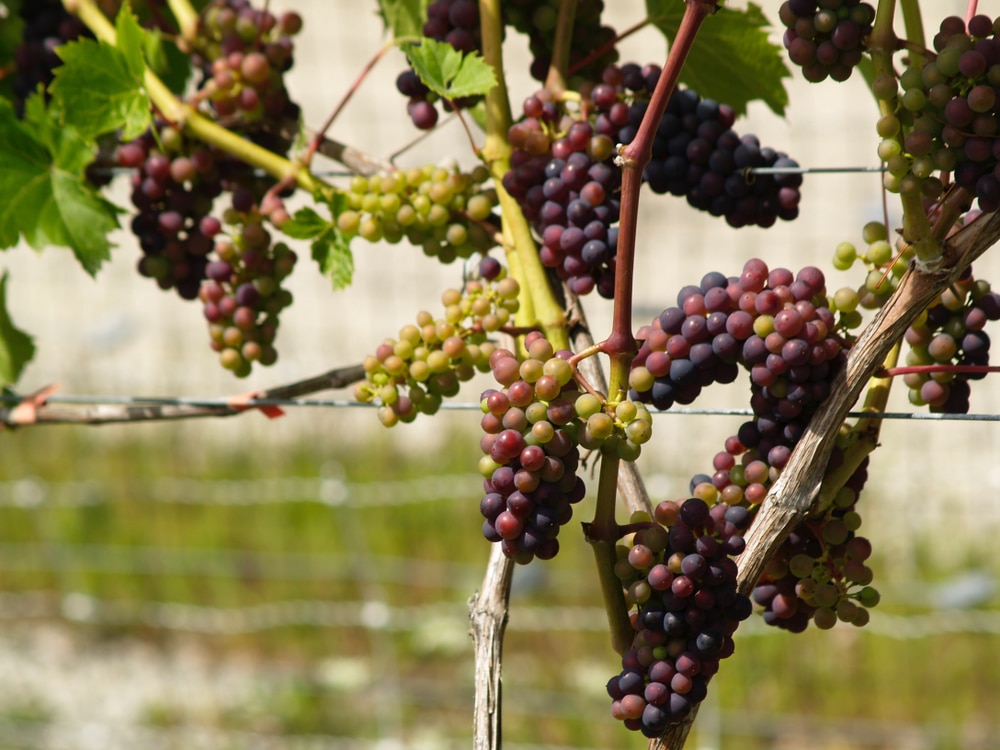
Unlike some fruits, grapes don’t ripen after picking, so be sure they’re ripe before harvesting. Ripe grapes are colorful, juicy, plump. Because your grapes may not all ripen at the same time, taste some from each bunch to be sure they are ready to eat. Generally, your grapes will be fully ripe in late summer or early fall.
Once harvested, your grapes will keep about six weeks in a cool, dry place like a cellar. Bear in mind that grapes tend to absorb the tastes or smells of other fruits and vegetables, so don’t store them in containers with anything else. Store your grapes in cardboard boxes or crates with a lining of straw for them to rest on.
What about insects and diseases?
Grapes are fairly hardy, but there are some bugs you may encounter, and some diseases that can cause harm. Some of these are easily prevented or can be treated without the use of dangerous chemicals.
Grape vines often attract aphids. Small bugs that may be green, yellow, or another color, aphids are nearly invisible to the naked eye; they leave signs of their presence, though. Yellow, curly, stunted, or deformed leaves are a dead giveaway you’ve got aphids.
Preventing aphids is relatively easy. Ladybugs, lacewings, and other good insects eat aphids and will safeguard your vines from infestation. Catnip repels aphids, so planting it near your vines might be helpful, too.
Getting rid of aphids can be done with several preparations, including a mix of water, dish soap, and cayenne pepper. Neem oil is another option, as is diatomaceous earth, although this should not be used when your vine is flowering as it will damage the plant.
Japanese beetles are colorful (green metallic head, copper colored back, tan legs, and little white hairs on their abdomens) and do a lot of damage. To get rid of these bugs, pick them off by hand. Japanese beetles should be killed when removed. This is easily done by carrying a bucket of soapy water to drop these insects in as you remove them; they can’t escape the soapy water, and drown.
Powdery mildew, a white powdery fungus that can appear on leaves; it does not require moisture to develop, and can grow in warm weather or cool. If your vine’s leaves look as if they’ve been dusted with flour, you’ve likely got powdery mildew.
The best way to get rid of powdery mildew is to remove all affected portions of the plant and destroy them. They cannot be added to your compost pile as they may continue to spread spores on the wind. There are fungicides, such as Neem oil, sulfur, lime sulfur, and potassium bicarbonate, which can clear up powdery mildew.