Avoiding Bruising When Harvesting Your Gourds
One sure way to avoid bruising or damaging your gourds is to use the stem as the cue that tells you when to harvest your gourds. Unless you are harvesting your gourds for eating, watch the stem and wait to harvest your ornamental, soft-shell gourds until it dries out and starts to turn brown.
If you are harvesting hard-shelled Lagenaria gourds or Luffa gourds, you should leave them on the vine as long as possible. Wait to harvest Lagenaria gourds until they have dried and turned brown. You should wait until you can hear the seeds rattling around inside of Luffa gourds before you harvest them.
If you squeeze your gourds to test the firmness of the gourd or the hardness of the shell, you risk bruising them. It you test the shell by attempting to slice into it with a fingernail, you risk introducing an entranceway for mold, bacteria, and fungal growths if you succeed.
Attempting to pull the gourds off of the vine or to twist the stem also can cause bruising. Leave at least an inch of stem on the gourd and cut the stem with scissors or a sharp knife. If you leave a longer stem, you can use it to hang the gourds to dry them. Hanging the gourds removes the need to turn them over every day to ensure that they dry evenly.
Cleaning Soft-Shelled, Ornamental Gourds
After harvesting ornamental gourds, wash them in warm, soapy water, and then rinse them in a bath of one-part household disinfectant or bleach and nine parts warm water. Avoid using hot water because gourds can split if the water is too hot.
Let them soak in this solution for about 30 minutes to discourage mold. When they’re done soaking, dry them thoroughly with a soft towel or cloth. Be careful not to scratch or bruise the surface of your gourds. When your gourds are thoroughly dry, you can begin the curing process.
Cleaning Luffa Gourds
You will want to remove the skin from Luffa gourds. Wash and rinse them as you would ornamental gourds, and then cut the top off of your gourds, turn them upside down, and shake them to remove the seeds.
Next, remove the skin from the gourd. The soaking rinse should ensure that the skin comes off easily, but if it doesn’t, place the gourds back in warm water and soak them until the skin softens enough that you can remove it easily.
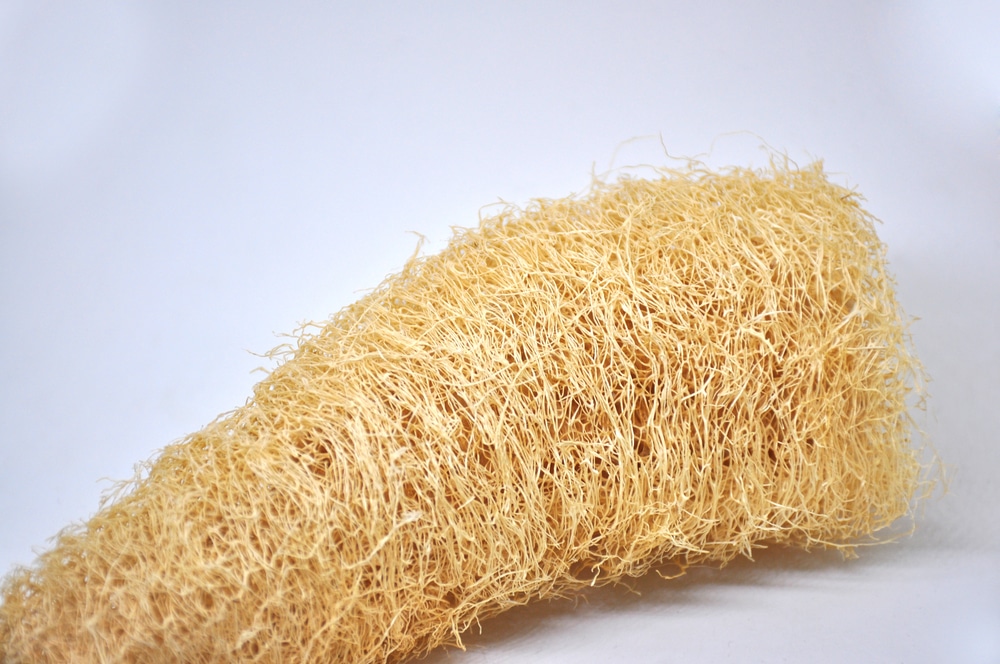
With the skin removed, soak the sponge material inside the gourds in the one-part bleach, nine-parts water solution to brighten them. When the sponges lighten to a creamy white, remove them from the solution, and thoroughly rinse and dry them before using them.
Cleaning Lagenaria Gourds
How you clean Lagenaria gourds depends upon how you plan on using them.
If you are simply using the gourd as part of an arrangement, cleaning the exterior as you would ornamental gourds is sufficient.
If you plan on applying paint or dye to the exterior of the gourd, you will need to remove the waxy skin. In this case, wash and rinse the gourds as you would ornamental gourds and then remove the skin as you would remove the skin from Luffa gourds.
If your project doesn’t require cutting the gourd open, then you can skip cutting the top off of the gourd and removing the seeds. Just proceed with the two step curing process, and the second part of that process will dry the interior of your gourds.
If you are going to cut a Lagenaria gourd open for your project, then you may need to clean the interior of your Lagenaria gourds.
Safety Precautions For Working With Lagenaria Gourds
You may need to take some additional steps to remove the skin from Lagenaria gourds. If you do need to resort to these additional steps, you will need to take some extra precautions because Lagenaria gourds can host black mold inside and outside of the gourd.
When working with Lagenaria gourds, take these precautions:
- Work in a well-ventilated space
- Wear a dust mask that will prevent you from inhaling both fine dust and mold spores
- Wear rubber kitchen gloves
- Wear goggles if you will be working on the gourd with power tools
Removing the Skin and Mold From Lagenaria Gourds
After soaking your Lagenaria gourds in the solution of water and bleach or disinfectant, place them in fresh warm water or begin working to remove the skin while the gourds are still wet.
Use a non-scratching scouring pad, a copper dish scrubber, or something similar to help remove the skin. Don’t use a steel wool pad, however, because bits of steel wool can become embedded in the gourd. Apply some pressure, but avoid scratching the gourd.
If mold on the gourd has created a white film, and you have difficulty removing it, spray it with dishwashing liquid and try scrubbing the gourd again.
If scrubbing fails to remove the mold, try scrapping the gourd with a knife or sanding it with a sander. If you use a knife, be careful not to cut into the gourd.
Rinse the gourd to remove any remaining skin and mold, and then allow it to thoroughly dry.
To finish preparing the surface of the gourd for painting or staining, sand it, starting with 80 grit paper and switching to higher grades as you finish smoothing the gourd’s surface and removing any remaining mold or skin. You can use a sander, sand paper, or a sanding block.
Cleaning the Interior of Lagenaria Gourds
Cut the gourd as needed for the project you are creating whether it’s a birdhouse, a dipper, a bowl, or something else. If you are making a birdhouse, you won’t need to scrape out the interior of the gourd.
Use long handled tools like a spoon, a melon baller, or clay sculpting tools to scrape out and remove the pulp and seeds for other projects.
If the seeds are in a ball that is difficult to remove or if the opening is too small to use tools or to remove the pulp, soak the gourd in warm water for 30 minutes, making sure that the water gets into the interior of the gourd. Try scraping the interior again. When you’re finished, let the gourd dry completely.
If you are making a dipper, a bowl, or some other container which leaves the interior of the gourd visible, you can sand it with a sander, a sanding block, sandpaper, a mushroom tool, or a gourd ball cleaner.
Finish your project with paint, dye, or primer. You can seal your project with paste wax, furniture polish or shellac for a glossy finish or with a semi-gloss or matte varnish for a more natural look. Your completed projects should last for years.