Varieties of peas
There are many types of peas available to grow. Sweet peas, for example, are ornamental and the pods are inedible. Generally, edible peas are divided into three categories:
- Shelling Pea
- Snow Pea
- Sugar Snap Pea
All three of these prefer the same growing temperatures, soil conditions, and planting companions. The main difference between them is how they are eaten. It’s always worth reading seed packet instructions because some varieties grow differently than others, and may require different infrastructure.
Shelling Peas (Pisum sativum)
These are fat, sweet peas inside fibrous inedible pods. Many European varieties of shell pea were developed throughout the 1700s. For this reason, they are also called English peas or simply garden peas.
These are the peas used to make pea salad, or canned and emptied later into familiar casseroles and curries. They must be shelled out of the pod before eating, and from there they may be blanched and eaten, dried, frozen, or canned. Some popular varieties of Shelling pea include:
- Garden Sweet – extra sweet peas, (75 days to harvest)
- Wando – this pea handles weather extremes well, moderately sweet, freezes nicely, (70 days)
- Spring – Prolific producer, moderately sweet, (60 days)
Snow Pea (Pisum savitum)
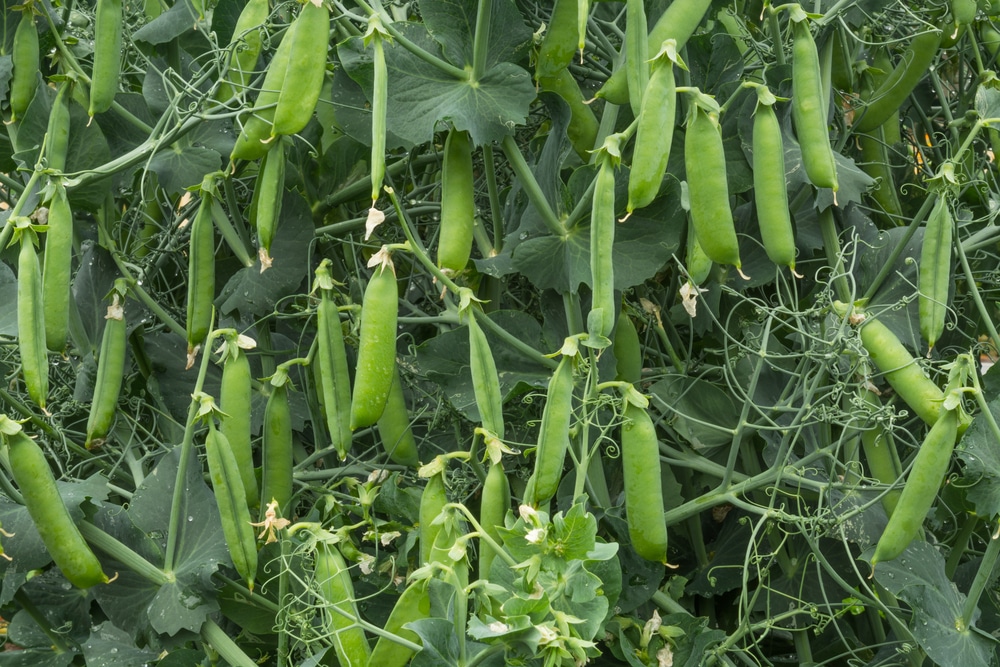
Snow peas are another type of garden pea that is eaten pod and all. They are flat and the peas inside look immature. That’s because they are, snow peas are harvested long before the inner peas grow to maturity. They have a sweet crunch to them and are typically eaten fresh, although they can be frozen.
These peas are commonly found in stir-fry’s, salads, or just served up lightly cooked with lemon juice. Some of the most popular varieties to grow in the garden are:
- Mammoth Melting Sugar – heirloom, 4-5 foot tall vines, very sweet, (70 days)
- Gray Sugar – Traditional snow pea, 18 inches tall, (65 days)
- Avalanche – Long pods, disease resistant, 3 feet tall, (60 days)
Sugar Snap Pea (Pisum macrocarpon)
The shelling pea and the snow pea were the first horticultural innovations of this vegetable. The sugar snap pea came from the best of both worlds. It was created in the 1970’s by Calvin Lamborn who was working on improving pea plant structure. His curiosity led him to breed several types of edible-pod pea that can be eaten raw or cooked.
This is the most common pea used in split pea soup. It can be shelled although doesn’t need to be. The pea, pod and all, can be eaten fresh, cooked, dried, canned, or frozen. Some popular varieties are:
- Sugar Bon – Disease Resistant, Sweet Pea, 2 feet tall, (55 days)
- Sugar Snap – Award Winning, 6 feet tall, very sweet, (65 days)
- Sugar Ann – Disease Resistant, 2 feet tall, Crisp and Sweet, (55 Days)
How to plant peas from seed?
prepare a garden bed by removing weeds and mulch. Turn the soil if it is compacted, and top it with 3-4 inches of compost. Peas will grow in a variety of soils from sand to clay but require a well-draining medium.
Plant peas during the cool seasons of spring and fall. Springtime will produce the best crops, and peas can go in the ground as soon as soil temperatures reach above 45°F (7.2°C). They’ll endure a frost easily, but a summer heat wave will wilt them.
Soak pea seeds overnight to ensure quick germination. If desired, mix a rhizobial bacteria inoculant into the water that the seeds soak in. Peas and bean have a special relationship with this soil bacteria which allow them to take nitrogen from the air and fix it into the soil. Most of the time this bacteria is already present in the soil, but adding it to your soaking solution will ensure that it is present during the lifecycle of your garden.
Plant peas 2 inches deep and 1 inch apart. Keep in mind that they will need a trellis or support to grow up. Depending on variety the height of the plant could range between 16 inches and 6 feet. When seedlings are 1-2 inches tall, you can thin to 3-4 inch spacing.
How to harvest peas?
If you amended your planting bed with compost prior to planting, peas shouldn’t have any fertilization needs at all. Other than regular watering, providing a trellis, and light weeding, there is little care associated with growing peas.
Snow peas are the first to be ready because they are harvestable at any point in their lifecycle. Young, fresh snow pea pods are the sweetest and most tender. When pulling them off the vines, be careful not to tug on the plant and rip it apart. Instead, use both hands to provide leverage for pinching or snapping the pod off.
The best time of day for picking peas is early in the morning before the dew evaporates. This is when all vegetables and fruits are at their most crisp and will store for the longest possible time. All types of peas can be eaten fresh or stored in the refrigerator for up to 5 days. Use another preservation method to keep them longer.
How to build a pea trellis?
How fancy you get with building a support system for peas is up to you. It can be as simple as sticking some cut branches into the ground for the pea to climb. Plant peas along a wire fence so you don’t have to worry about building anything. Pea tendrils will wrap around many materials from fence fire to twine to trellis wood.
If your peas are in rows, you can pound in two stakes and run garden twin between them. Pull in tight to create a twine fence for the peas to cling to as they grow. Or, use extra tomato cages and place one around each plant.
Companion plants
Peas are the ultimate garden companion plant. They not only grow well with most other garden herbs and vegetables, but they actually benefit them by pumping nitrogen into the soil. The best way to get the most from your pea plants is to rotate them through the garden giving each planting bed a rotation of peas.
The largest nutrient benefit comes from allowing the roots to decay in the soil. Living pea plants will feed other non-pea or bean plants around them, but they will feed much more heavily after being harvested.
When pea plants begin to brown and are no longer producing peas, simply allow them to compost back into the bed. If this isn’t an option because you want to use the space, then cut them at the soil level and plant around the roots. let the roots decay and release plant-available nutrients. Other members of the pea and bean family will not benefit from this bacterial relationship because they share it.
Common pests and problems
Peas are fairly resistant to most issues, some varieties more than others. Powdery mildew is a white powder-like fungus that can affect leaves in wet climates with improper air flow. However, several varieties of pea are resistant to this fungus so if you live in an area that is prone to powdery mildew, purchase resistant varieties.
If a plant is yellowing, it’s likely a nutrient deficiency. Add a layer of fresh compost as a mulch and water it in. In some cases, yellowing is a sign of over-fertilization. Peas do not require nitrogen and may suffer if a heavy nitrogen fertilizer is used.
Mice can be a problem with pea seeds, particularly if you are starting them in a greenhouse. Mice will dig up peas and eat them straight from the ground. You may not notice for a couple of weeks until your peas don’t sprout.
Combat this by placing a screen or netting over the soil. It can be removed once they germinate. Wrap seedling trays in plastic to prevent mice or birds from stealing seeds.